
Want to keep an eye on your spending and stay on top of additional usage charges? With alerts, you can easily track non-inclusive calls, texts, and roaming charges. Let's walk through the process of setting them up!
Best Practices 📋
For the best experience, we recommend doing this from a PC or laptop. If you don’t have one, don’t worry—you can still use other devices.
Step 1: Log into My Bills 🔐
- Access the My Bills page at www.homeunity.co.uk.
- Click on 'Customers,' then 'My Bills,' or click here to go there directly.
- Enter your username (either your email address or your account number) and your password to log in.
If using a mobile device, press the menu symbol (the 3 lines) in the top right and select 'Desktop site.'
Step 2: Adding an Alert ➕
- Using the menu, go to Settings > Alert Manager.
- Scroll down to the section ‘Service Level Alerts’ and press the green button ‘Add New Alert

On a mobile device, you may see just a green line—click on it.
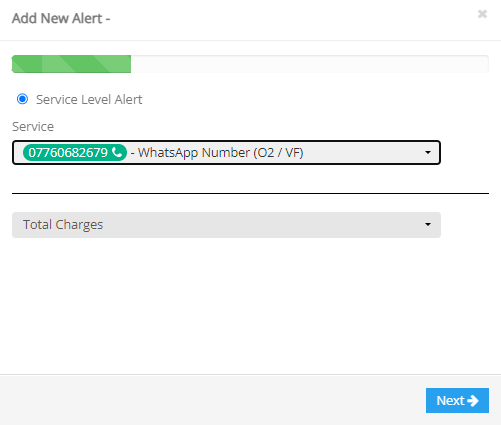
- 3. A pop-up box will appear:
- In the Service Box, select the telephone number you want to set alerts for.
- In the box below, choose the type of alert you want to set (see descriptions below).
Alerts run throughout the month, so any alert you set up will be per month (but don't worry, you'll be notified each month as soon as you hit the limits you set)
- 4. Select the type of alert, then press 'Next'
- 5. Set your thresholds for when you want to be alerted (you can choose multiple alerts):
For mobile services, you can set a bar to automatically suspend chargeable activities when the limit is reached.
All prices exclude VAT. For example, for a £10 alert, divide 10 by 1.2 to get £8.33, which you’ll enter.
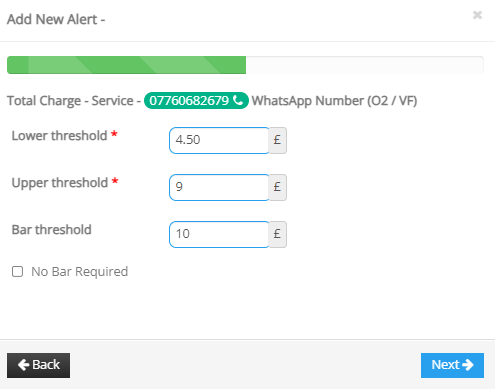
- 6. After setting your thresholds, select 'Next.'
- 7. Tick to receive emails for the alerts you’ve set up, then press 'Next.'
- 8. Choose up to 3 email addresses and mobile numbers for the alerts (separate them with commas and no spaces).
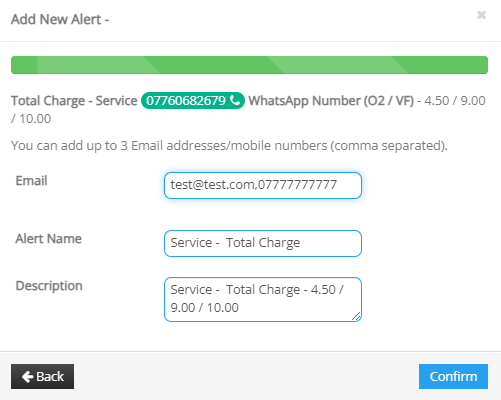
- 9. Press 'Confirm'—you’re done
Step 3: Editing an Alert ✏️
- Using the menu, go to Settings > Alert Manager.
- Scroll down to the section ‘Service Level Alerts.’
- Click the pencil icon next to the alert you want to edit.
- Change the thresholds as needed.
For mobile services, you can set a bar to automatically suspend chargeable activities when the limit is reached.
- 5. Once complete, press 'Next.'
- 6. Tick to receive emails for the alerts you’ve set up, then press 'Next.'
- 7. Choose up to 3 email addresses and mobile numbers for the alerts (separate them with commas).
- 8. Press 'Confirm'—you’re done!
What Do the Different Types of Alerts Mean? 📊
Here are the different types of alerts, listed based on what’s most useful:
- Voice/Data/Event Bundle: Set alerts based on the percentage of usage within your bundle.
- Total Charges: The total cost of all charges.
- Voice Charges: The total cost of call charges.
- Data Charges: The total cost of mobile data charges outside your bundle.
- Event Charges: The total cost of special charges like MMS, premium SMS, and daily roaming fees.
- Voice Usage (Overage): Minutes over your calls bundle allowance.
- Data Usage (Overage): MB over your data bundle allowance.
- Voice Usage (All): Total minutes (inclusive and outside of your calls bundle).
- Data Usage (All): Total MB (inclusive and outside of your data bundle).
- Event Usage (Overage): We recommend using Event Charges or Total Charges instead.
- Event Usage (All): We recommend using Event Charges or Total Charges instead.
Stay on top of your spending and manage your account effortlessly with these helpful alerts! If you need any assistance, feel free to reach out. 😊📲